DRAGON CRUSADER TUTORIAL
By Corey Loving
Hi all! For this tutorial I used a wacom intuous 2 tablet, Photoshop CS 2, painter IX, and sketchpaper. This is just a quick demonstration of my painting process.
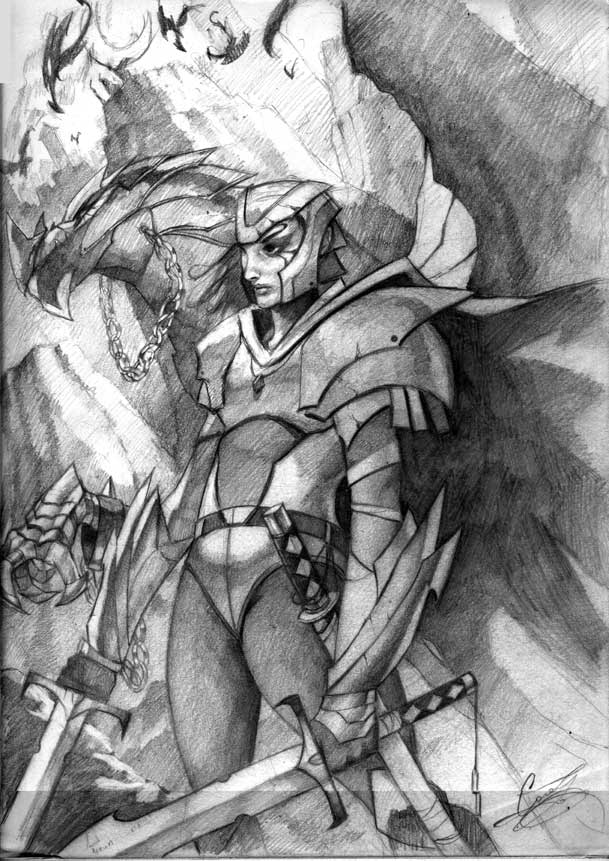
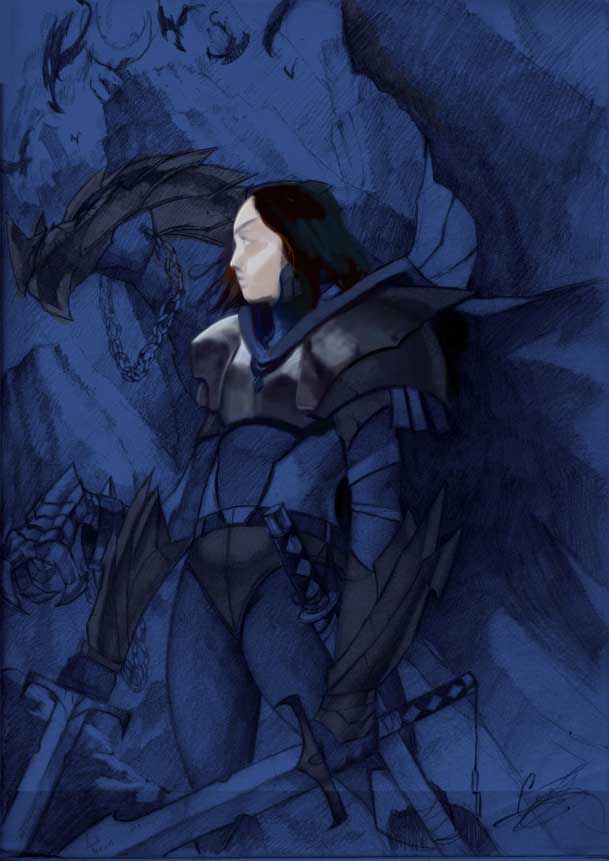
STEP 1.
To begin, I make an initial sketch in my 9x12 sketchbook. I wanted the picture to have a theme of dragons and armor. Something around that so thats pretty much what I made. The drawing was rendered with a mechanical pencil.
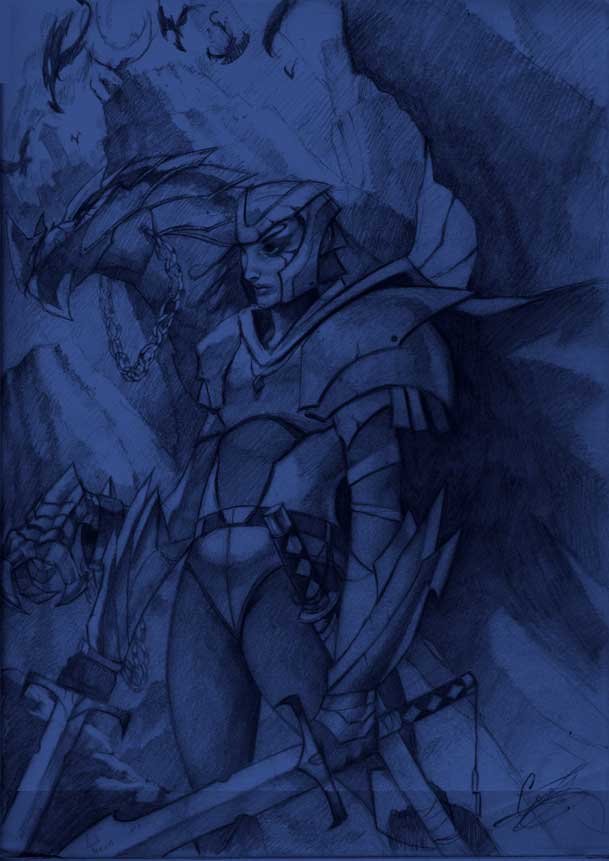
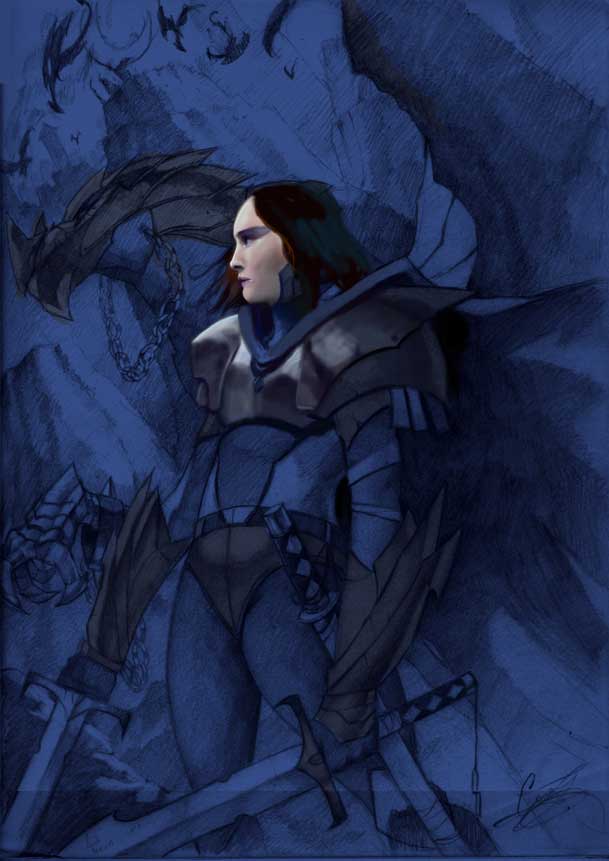
STEP 2.
I scan into PHOTOSHOP CS2 ( Any photoshop will do, and set the line art on a new layer. Then I make the background layer a blue color, because the overall colorscheme is going to be blue.
STEP 3.
I continue to add color underneath the linework geting a basic overall feel for what I want the colorscheme to look like.
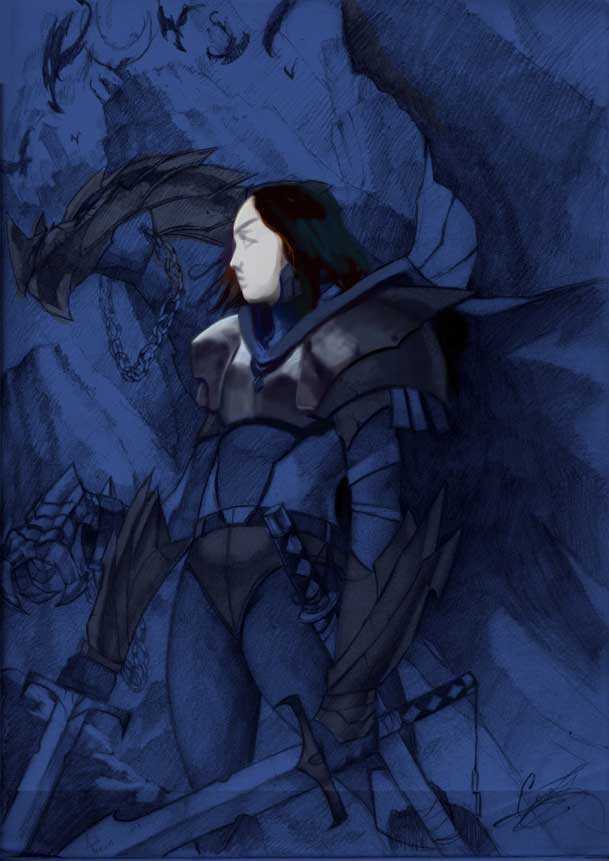
STEP 4.
I wasn't too pleased with the way the face was looking so I made a new layer over the linework, and begain forming a new face using one midton color, and a basic outline of the features. I used a normal hard round brush set on opacity pressure for this.
-Also note that I turned the background layer back to blue because i didnt like the way the color scheme was going. Never be afraid to adjust your work and breakoutside your comfort limit or your initial linework.
STEP 5.
Using a plane round brush we add value and form to the face.
STEP 6.
Doing the same as before just adding more and more value as we start to see our face begin to form.
STEP 7.
This is where things really start to heat up. I switch from a hardedge roundbrush to a SOFT edgehardbrush and begin to think about light source. Just puting an arrow were the light will hit is a goodway to remind yourself were to cast your highlights. Also I begin to redefine certain areas that i didnt like, such as the face. I just find soft brush are alot easier to blend from. Going from soft to hard is a good way to do art for me and maybe for you too. Try it sometime : )
Also note I begin to do alittle color in the background again working slowly.
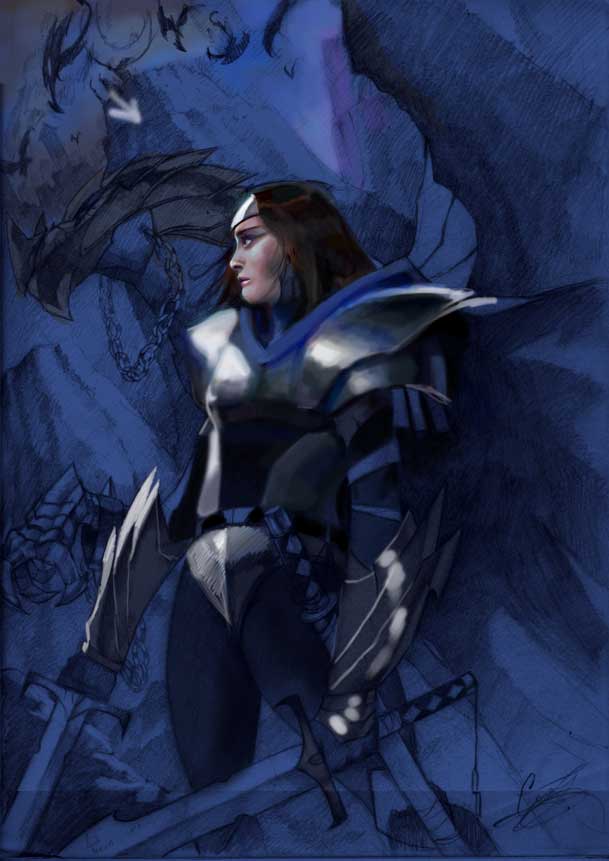
STEP 8.
Small tweaks in the armor.
STEP 9.
I begin working on the dragon alittle, using the same process as before.

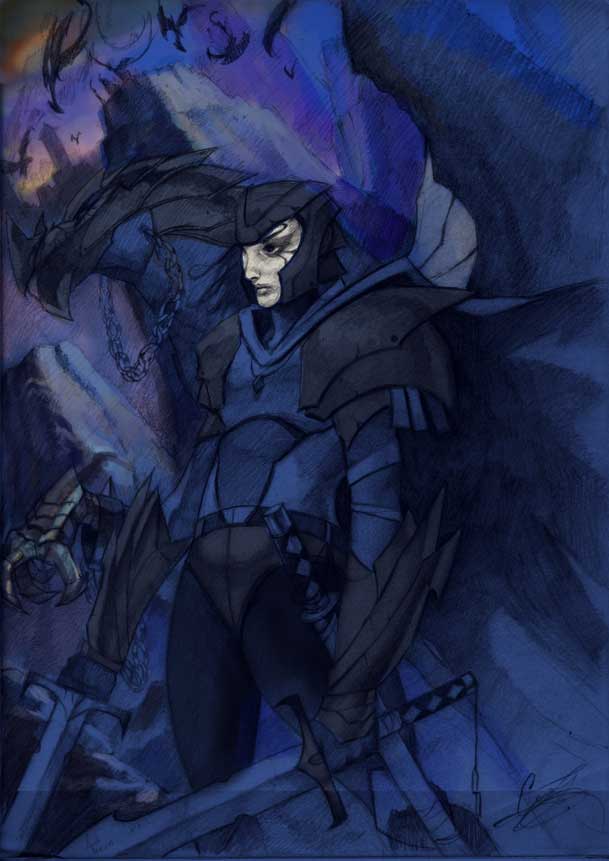
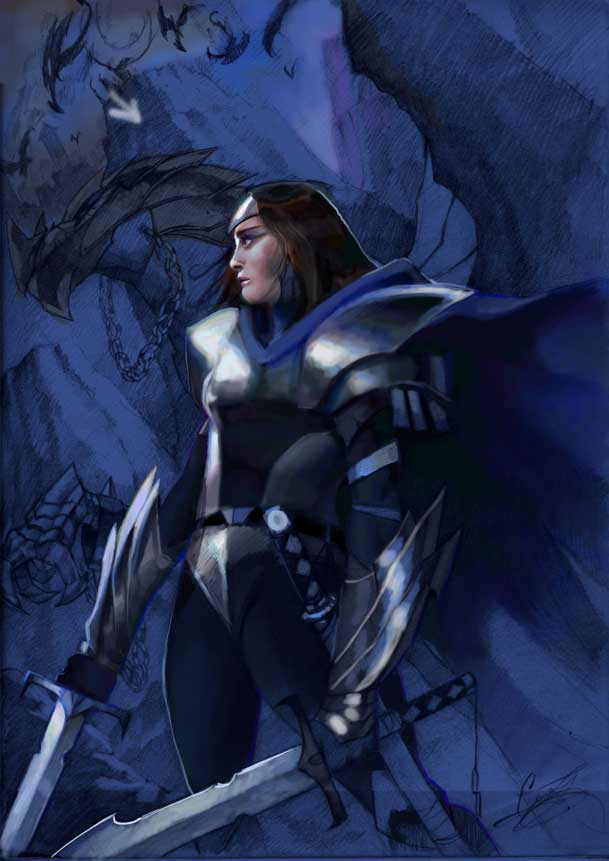
STEP 10.
This step is a major leap. I spent a roughly one day just working on the background and adding more detail. Now the entire picture is being pieced together to near completion.
STEP 11.
Here we really did deep and switch to a very small brush and begin adding the smallest details. Just to mention, I do alittle technique here where I outline the shapes with high contrast colors to make the picture look alittle bit more saturated and to add visual interest to the pic.
STEP 12.
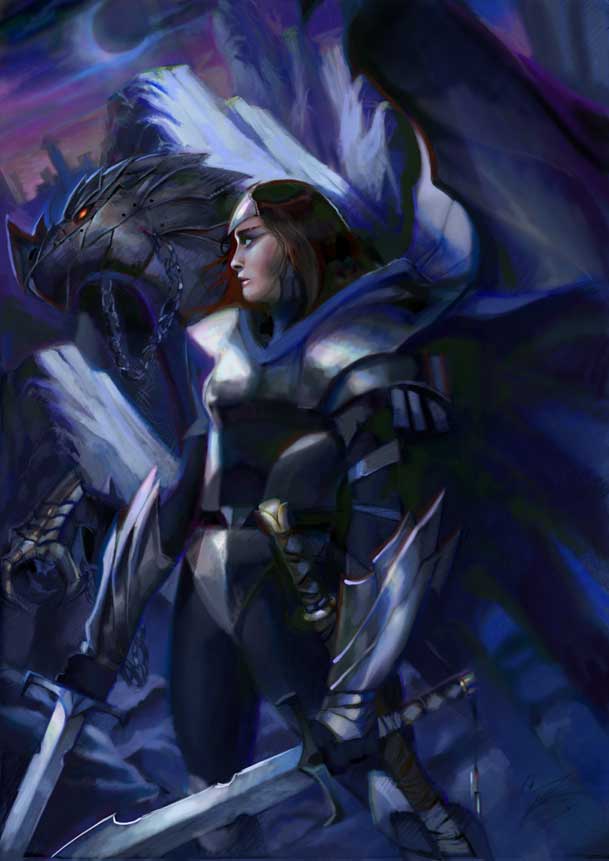
To finalize the piece I bring it into PAINTER IX. I flatten the entire image so there is only one layer and use the JUST ADD WATER brush to blend and smooth areas on the picture. After that I select the SMEARY ROUND brush set to CAMEL HAIR, and add small of new detail into the final image. Overall thats the entire process for making this picture. I am never really happy with my end results, but I try to keep myself busy, and i hate working on one picture for too long, which is sorta bad sometimes. Anyway thanks for checking out my first CG Painting Tutorial. Keep Drawing!!! OR ELSE!!!
-Corey
/DragonCrusader.jpg)
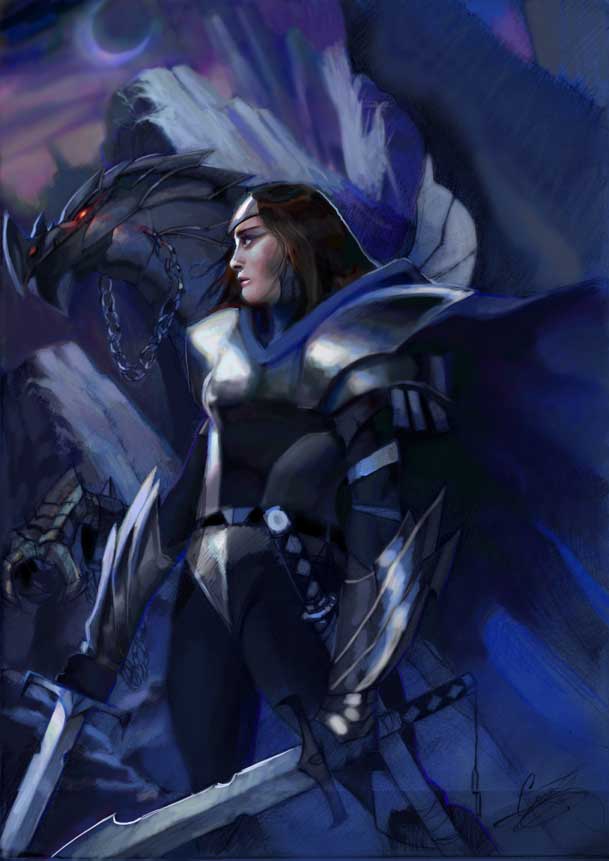
LETS SEE IT IN ACTION!
ENJOY!!!
-Corey
![]()
Original Artwork by Corey© Copy right Corey Loving. 2007. Allrights reserved